Mame overflows are simple, elegant, and can keep a small rimless aquarium from looking cluttered with equipment. But, there is one little problem: their instructions are in Japanese. No need to worry though. The pictures are pretty easy to follow – and here are a few little tips for setting one up.
3 Extra Tips for Setting Up Mame Overflows:
First: be sure to choose the right size return pump – not too weak and not too strong.
Saltwater Conversion – one of the only places that sells Mame Overflows in the U.S. (and a lot of other neat aquarium equipment) – recommends using a pump rated for at least 528 gallons per hour. Why? Because Mame overflows have a neat little feature build into them – a venturi tube – that will re-start the overflow siphon if there is ever a power outage. If your return pump is too weak, the water flow won’t be strong enough to restart the siphon.
However, what isn’t mentioned is that too strong of a pump may cause problems too.
I started out with a Sicce Syncra Silent 3.0 rated at 714 g/h. It was far too strong. Even with the pump set to its lowest possible flow AND a ball valve in the return line that was nearly closed, the pump still emptied my sump return chamber before the siphon could restart and send water back down to the sump.
Disclosure: This article contains affiliate links. When you follow a link to purchase the products, I sometimes earn a commission, at no additional cost to you. Read my full disclosure here.
I’ve since used both a Sen 550GA and a Tunze USA 1073.020 – both of which were very quick and easy to set up with the Mame overflow.
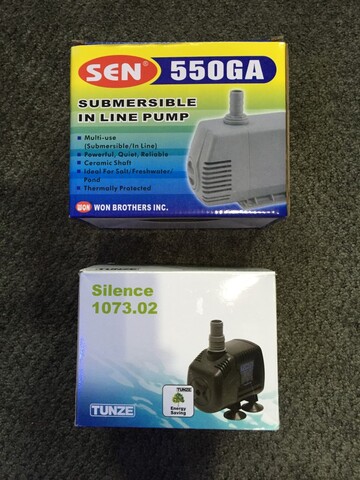
Both are great pumps, and the flow is adjustable. The Sen isn’t very loud, but the Tunze is even quieter. (I’ve only been running it for a week, less than half the recommended break-in period and it is already nearly silent.)
Second: make sure your overflow hose reached deepen enough into your sump.
The first time I hooked up the Mame overflow, the tube emptying into the sump was gurgling very loudly and causing a lot of bubbling and splattering in my sump. I even tried cutting a ‘breather’ slit in the overflow tube and slicing an angle off it’s bottom as illustrated in one of the pictures in the instructions.
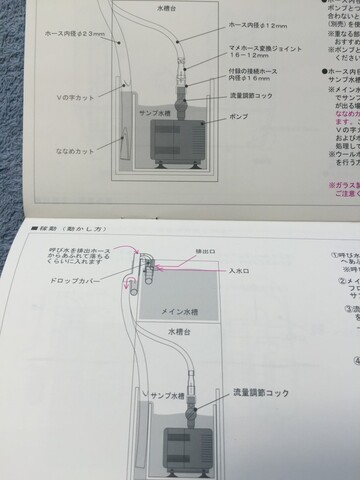
The angled slice helped a little, but not much. The breather slit seemed to make it worse.
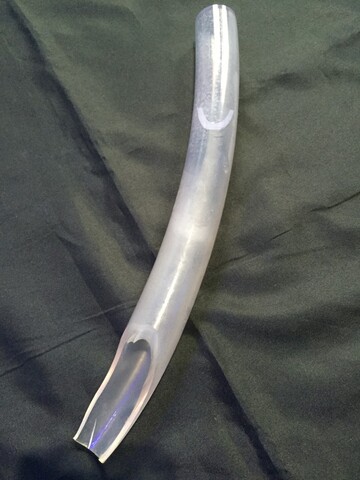
I should point out that my overflow tube only reached about 3″ beneath the water surface in the sump.
The only other thing I could think of trying was having it reach further down near the bottom. So, I cut off the angled part (as you can tell from the pic above) and stuck a piece of PVC in tubing to make it longer. Worked like a charm. Far less churn and gurgle inside the bottom of the tube. Softer and less bubbling where the water exits the tube.
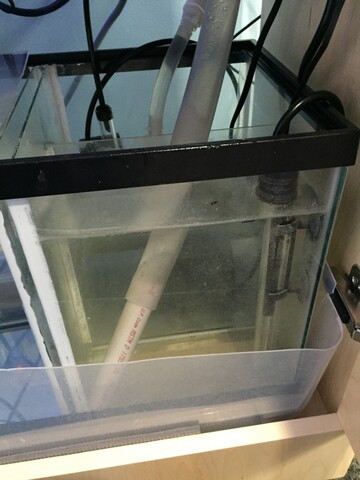
Third: if you need to find extra tubing for it, try Lowe’s.
It comes with all the small pieces of clear vinyl tubing needed for connecting the piece of glass that make up the Mame overflow. For the long pieces that go down to, and back up from the sump, or extra small pieces for connect the glass parts, try Lowe’s or Amazon. Home Depot does carry clear vinyl tubing, but the Samar brand of tubing a Lowe’s is clearly labeled as being food grade (e.g. safe for aquarium use) and is available for purchase by the foot, so you can get whatever length you need.
You’ll need 1-1/4″ OD (outside diameter) x 1″ ID (inside diameter) tubing to go from the overflow siphon down to your sump.
And some 5/8″ OD x 1/2″ ID tubing to go from your return pump back up to the Mame overflow.
How to Tell Your Mame Overflow is ‘dialed in’:
When you get everything set up, start with your pump turned down to the lowest flow possible. Turn it on and see if your Mame overflow begins sending water down to your sump before your return pump runs out of water. If not, turn everything off… wait until NO more water is drains down to your sump… turn your pump up a little more… then turn it back on and try again.
You’ll know your pump is dialed in right for the Mame overflow when the siphon is sending water down to the sump AND the water level in your return pump reservoir stops dropping and holds steady before it gets low enough for the pump to suck in air. Then test it a few more times: shut it off… let the water finish draining… and restart it. Each time you do it the siphon should restart on its own and the water level in your return pump reservoir should ‘level out’ at the same height each time. If it does, you’re all set and good to go!

